
25 things I learned during my first year as a Video Editor
When I was 13 years old, I got my first summer job. I decided to spend all the money I earned on a video camera. My first own video camera.
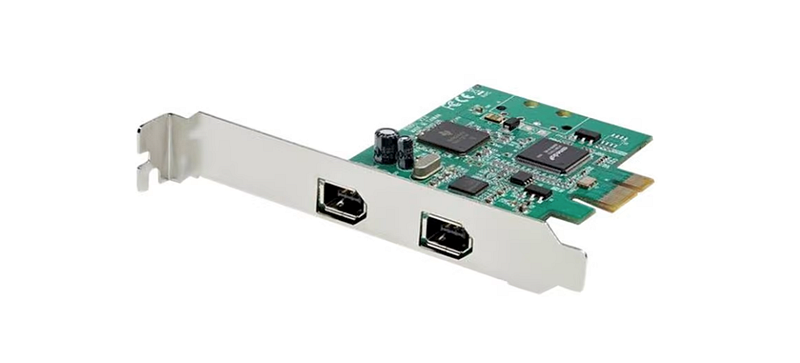
The camera recorded tapes, and I needed to buy an extra part for my computer (plus a separate cable) in order to transfer the footage from the camera to my hard drive via “Firewire”. Good old times. 😄
I‘ve kept this interest in filmmaking ever since, but I‘ve never turned it into anything serious until 2017 when I started an internship as a video editor.
At the time, I was 28 years old but I had no previous professional experience nor education in video editing — just a big interest. So I pretty much started from scratch.
After doing a 15-week internship at that company, I got hired full-time. Since I was their only video editor, learning by doing has been the only way forward for me.
Two years later, I started freelancing.
As you can imagine, I made a lot of mistakes during my first year as a video editor. However, these mistakes helped me to become better at what I was doing.
Here are 25 things I learned during my first year as a video editor:
1️⃣ Practice before pressing “record” If you are filming b-roll and want to do some camera movement, try it out a couple of times before pressing record. That way the final result will be better and you won’t need to import and go through three clips later on. It saves time in your edit and saves space on your hard drive.
2️⃣ Have (at least) one extra memory card in your camera With an extra memory card, you can transfer the footage from the first memory card to a computer and continue to record with the other card in the meantime. (Some cameras can even record to two memory cards at the same time, ensuring you’ll always have a backup.)
3️⃣ Always have enough batteries with you when filming You don’t want to end up missing a great shot simply because you’re lacking battery. The adequate amount of batteries entirely depends on your camera, the duration of the shoot, and the type of project.
4️⃣ Always try new angles Don’t just stand in your regular position and film. Stand on a table, climb a tree, lay down on the floor, film through things, use mirrors… Experiment with new angles and perspectives to push yourself, and find new ways to tell the story. Sometimes it will look like crap, but that’s part of the journey. Take advantage of the fact that you are holding a camera and give the viewer an experience they wouldn’t get from their normal life.
5️⃣ Use windows as an extra light source Daylight is often referred to as natural light in filmmaking. It’s the cheapest light you can get (and a lot of time also the best light). Take advantage of that when filming inside and make sure to keep the windows behind you.
6️⃣ Learn about FPS FPS stands for frames per second and it has a big impact on the look of your video. It’s important to really understand how the framerate, shutter speed, ISO, and aperture work together. If you know these things, you can create exactly the kind of style you’re going for.
7️⃣ Choose the right editing software for your needs I have personally tried many different editing programs, but in the end, I decided to stick to Adobe Premiere Pro.
However, finding the perfect editing software for you is all about your individual preferences, and highly depends on what kind of work you’re doing. Take the time to try out different ones, and continue working with the program that feels right for you.
8️⃣ Create a “project folder” A project folder is simply a folder with a specific folder structure, and some commonly used files. (For example an intro, a logotype, other graphic elements, and sound effects.)
When starting a new video project, you just have to copy and paste this project folder, rename it, and place all your files (video, audio, graphic) in the new folder. It saves an enormous amount of time in the long run when you have everything sorted in one folder.
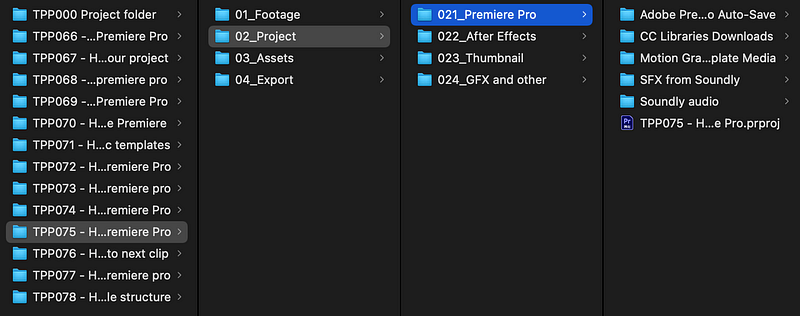
9️⃣ Create a good folder structure from the beginning Organize your files into subfolders. I always use these four folders: 01_Footage 02_Projects 03_Assets 04_Export
I put the footage (video, audio, screenshots) in the first folder, project files and thumbnail files in the second folder, assets (like graphic elements, intro or sound effects) in the third, and the final export in the fourth one.
Pro-tip: Always keep all your subfolders, even if they’re empty. This will make your structure consistent over a longer time. (Files might also be added to those folders later on). It’s better to have it well organized from the beginning than having to move files around later and relink them in your project file.
1️⃣0️⃣ Find free music on Soundcloud One of the resources I used to find copyright-free music when I started out was Soundcloud. They have a big variety of songs you can use for free, and it’s a good place to start if you can’t afford a monthly membership at some music library yet.
(I have done a very straightforward tutorial on how to download free music from Soundcloud, which you can find here.)
Other good resources are Free Music Archive, Epidemic Sound, Artlist, Soundstripe, and Premium Beat. (I can really recommend Artlist and I use that service myself. Sign up for Artlist here to get 2 extra months for free!)
1️⃣1️⃣ Use proxy file Proxies are basically lower-quality copies of the original footage. If you have high-resolution videos, proxies are a must if you want your computer to be able to process all your edits and preview them at full speed.
Watch this video if you want to know how you can create proxies automatically when importing footage to your Premiere Pro project.
1️⃣2️⃣ Don’t use wireless headphones when editing If you do this, you could experience a slight audio delay which can lead to problems if you’re trying to edit to a beat or sync video with audio.
1️⃣3️⃣ Create a clear editing process and follow it Your productivity will grow dramatically if you do things in the right order and learn to follow a specific process. (For example, I always do a rough cut first, before I do any corrections to the footage. Why waste time correcting files you’re not going to use?)
If you don’t have a process for editing your videos yet, just start simple and refine it with every project. This will help you maintain a high standard, save time and help create estimates for different projects better.
1️⃣4️⃣ Compress video files With “HandBrake”, you can compress large files to save space on your computer and make it easier to work with. (Just make sure to choose the right FPS and don’t set the quality too low.)
1️⃣5️⃣ Learn keyboard shortcuts I can’t stress enough how big of a difference this will make to your workflow. Invest the time you need to learn not just the most needed shortcuts, but as many shortcuts as possible. You will thank yourself later.
Click here for my top 10 keyboard shortcuts for Final Cut Pro. Click here for 14 keyboard shortcuts in Premiere Pro in under one minute.
1️⃣6️⃣ Focus on faces when doing color correction When you have people in your videos you will instinctively look at their faces. That’s why it is so important to get the skin tones right.
If you can’t color correct the whole video perfectly, make sure to have the right brightness and color tone in the face. (Color correction of people’s faces is more than just a matter of taste/style. A wrongly edited face can make the person look embarrassed, angry, nervous, or even sick.)
1️⃣7️⃣ Practise color grading Color correction is about creating a neutral look. Color grading, on the other hand, is an art. This is where you put your personal touch on the video. If you want to get better at utilizing colors in your editing: watch videos, study how others do it, try to copy different popular styles (as a practice), and then apply what you learn to create your own “look”.
1️⃣8️⃣ Choose music based on the clip, not your own taste Even if you have an idea of what kind of music you want to use, it’s always good to look at the actual footage before picking the right soundtrack. Use music and sound effects as a tool to enhance a certain feeling in a certain situation. Good audio design is when you don’t notice it.
1️⃣9️⃣ Use “J-cuts” J-cuts are cuts where the audio in a specific clip starts before the video. (A very common technique used in movies.) If you think about it, it’s very similar to when you’re having a real discussion with a group of people. When the next person starts speaking, you often turn your head to see him/her after he/she has started talking.
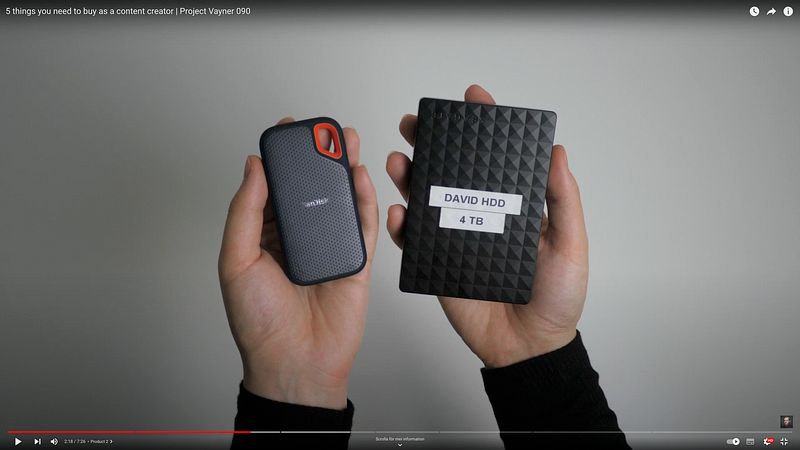
2️⃣0️⃣ Use the right type of hard drive There are SSD harddrives and HDD harddrives. SSD is fast but expensive. HDD is cheaper but slower. Have the project you’re working with on an SSD disc and store finished projects on HDD hard drives.
2️⃣1️⃣ Check for “offline media” before closing the project For safety (and to prevent future headaches), go through your project before closing your editing software to check for “offline media”. This can be a problem when trying to open the project the next time. (The most effective way is to select all files in the project, turn them offline and then re-link everything and see which ones are still offline).
2️⃣2️⃣ Don’t update the software instantly Don’t update your editing software midway through the project. Updates can sometimes have bugs and might cause trouble with your current project. Finish the project and THEN do the update. Trust me.
2️⃣3️⃣ Create “export presets” Exports can take a lot of time and creating presets of your export options can help you be more efficient. Experiment with different existing presets, do some research, compare different options and save the best option. (You can always update it later.)
2️⃣4️⃣ Use “MyAirBridge” to send large files This is a site where you can send video files up to 20GB in size, for free! (Wetransfer.com is a good alternative as well.)
2️⃣5️⃣ Take Backups. I can’t stress this enough. The last thing you want to do when putting hours, days, or weeks into filming and editing something is to lose it all because you didn’t create a backup. You can e.g. use programs such as “GoodSync” or “ChronoSync” to back up your files.
🎁 BONUS TIP: Install TubeBuddy This is a great plugin for YouTube that helps you improve your tags and titles, provides you with promo material, industry news, search rank tracking, integrations to your account, and many other helpful and time-saving features. This is a must-have for every YouTube creator. Sign up for TubeBuddy here.
(You can also A/B-test thumbnails with TubeBuddy, which is super helpful for improving your click-through rate, and thereby also your views.)
I hope you found this helpful! 🙂 If you want more articles like this, please follow me here on Medium!
— — — — — — —
Did you know? You can get full access to every story on Medium for just $5/month here! Becoming a Medium member directly supports me ♥ ️(and other writers on Medium) so that we can keep creating helpful content for you! 🙏