
How To Build A Smart Lock With Python And EV3dev
High-level instructions on how to build a working smart lock with LEGO’s EV3 brick and some simple Python code.
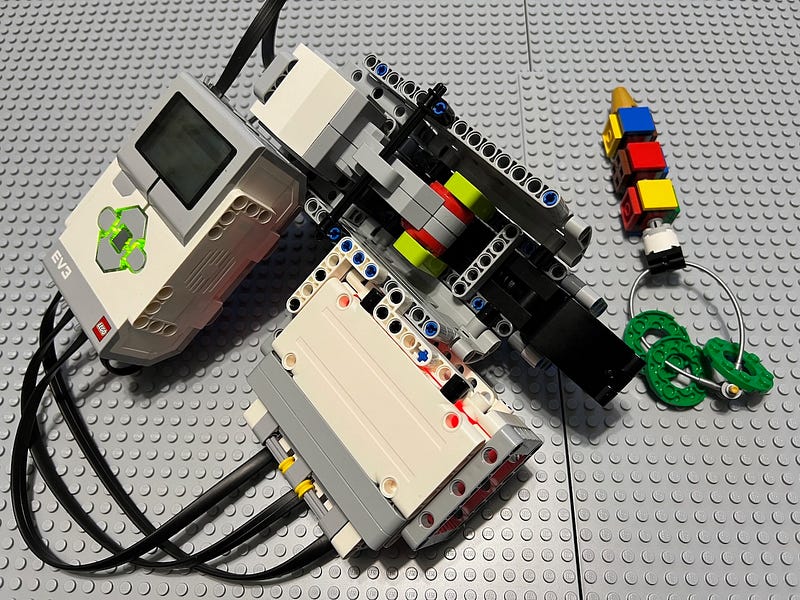
One smart LEGO EV3 brick, some 150 mostly Technic pieces, a laptop, and some good ol’ Python. That was all I needed to take everything I’ve learnt from the LockPickingLawyer over on YouTube and apply it to a smart-lock of my own! Seriously, check out his channel, you’ll learn a lot about lock safety and mechanisms. Now, while I’m sure he’d find plenty of flaws in my design, I did have this idea a few weeks ago of creating a smart door lock that had a variable colour-coded key.
If your first question is why colour-coded, I think my answer will be as standard as it could be from an engineer: because I could. Seriously, not joking. I could, and because I don’t know of any keys that are both variable and colour-coded. The reason I could, was because, well, I have a bunch — three to be more exact — of LEGO Mindstorms EV3 smart-bricks, and a good number of related sensors and motors, so it made sense to prototype the idea with LEGO.
Honestly, The LEGO Group is being an absolute eejit for discontinuing what was to date probably the best and coolest prototyping tool ever created for those interested in robotics and automation. I’m certainly going to hang on to everything I have now that they’ve been discontinued completely. Eejits, I tell you. Eejits.
What’s a variable colour-coded key?
Well, I might have just made the term up myself, but essentially, it’s a programmable key, where you can literally change the configuration of the key, giving you a broad range of options. In my case, I went with seven colours: white, red, green, blue, yellow, brown and black, where white gets ignored, just to confuse someone wanting to “pick” the lock. Let’s call it a “security pin”. 😉 Either way, this gives us 343 permutations according to omnicalculator.com, because colours can repeat.
The variable aspect of it, which, I think, is possibly the cleverest part of all this little prototype, is in allowing the key elements to rotate freely. This essentially means, that as soon as you take the key out of the lock, the colours naturally get mixed up, so anyone grabbing the key from you would have just as hard a time getting in later if they had 343 individual keys to try out.
Add to that the “security pin”, which in my design is factory set to white, and you have yourself what, I think, is a pretty decent locking system for a toy prototype. I mean, I know keypad locks that are ten times less secure. Just look at this Smith & Locke Medium Duty Push-Button Lock sold for 32 bucks, and used in a ton of places. I’ve seen office doors locked with this crap. These types of locks are so bad, even the order of the combination doesn’t matter! 🙀 In mine, however, it does. Say for instance you choose the colours red, blue, and yellow. Try to open the lock with a yellow, red and blue combination, and it will tell you to sod off.
For all intents and purpose, it’s a mechanically programmable key, with built-in self-obfuscation.
Prerequisites for building an EV3 LEGO smart lock
You’ll obviously need a few key components, and I wasn’t lying in the introduction; that is kind of all you need, but let’s get into a bit more details, and allow me to clarify a few aspects.
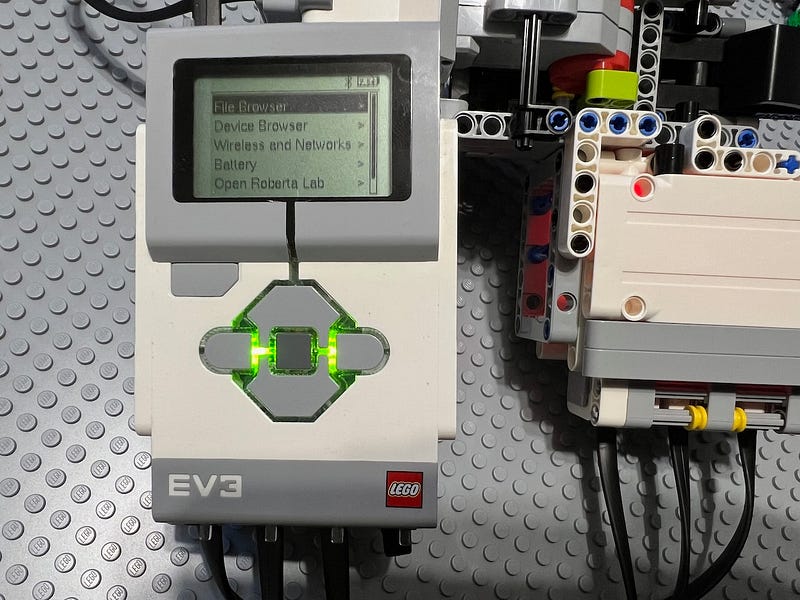
- An EV3 brick. This is essential. It cannot be another edition of LEGO’s smart brick, and you’ll see soon why. It has to be the one from set #31313 or the official education edition set #45544. You only need one smart brick for this prototype. You can also get it separately, but not for much longer.
- You’ll also ideally need three light/colour sensors. You can also do it with one, but then you’ll have to get very clever with your programming, as you’ll need to keep track of colour sequences and such. These will read the various colours from the key, and allow us to set the colour key in setup and reset mode.
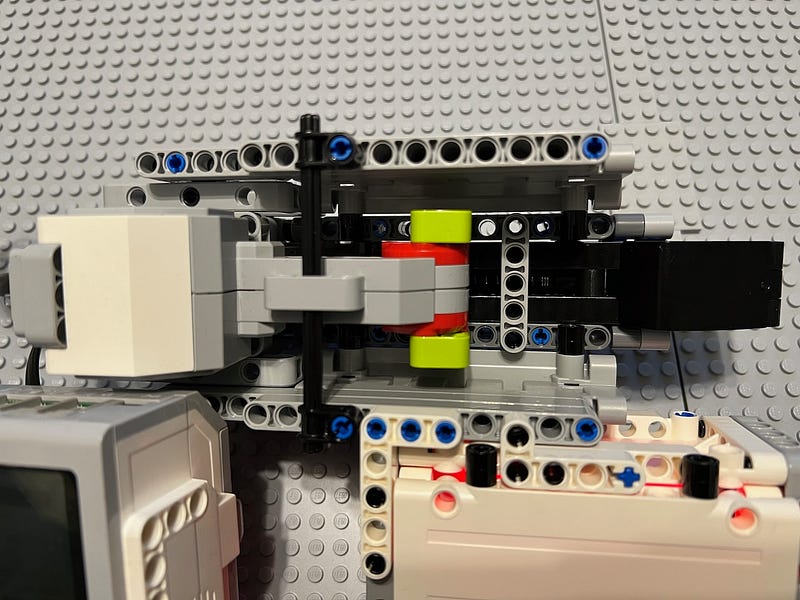
- A large EV3 servo motor. This will drive the lock’s tongue and has enough power to move that, regardless of the spring putting tension on it.
- Finally, you’ll need a touch sensor. This will allow us to push back on the tongue to trigger the reset mode, in case we want to change the colour combination.
- Some LEGO bricks, ideally Technic, but frankly, as it always is with LEGO, your imagination is the limit, so be that Technic or System bricks, you’ll still manage to recreate the prototype. If you use System bricks, I would recommend substituting the Technic spring with a rubber band.
- Basic Python knowledge. I will perhaps soon write a companion article for this, introducing folks to the very basics of Python, but for now, you can learn these over on Codecademy or the many resources linked in this FreeCodeCamp article.
- A computer. It can be something as simple and cheap as a Raspberry Pi, and as premium and expensive as a Mac. A Windows machine will also do just fine. I used my trusted M2 MacBook Air.
- A microSD or microSDHC card (2 GB or larger, though not larger than 32 GB — a limitation imposed by the EV3 brick).
- In terms of software, you’ll only need two things: VSCode and EV3dev. Additionally to VSCode, you’ll want to install the ev3dev-browser plugin. This will allow you to upload your project effortlessly to the brick.
OK, I know that looks like a lot of prerequisites, but trust me, it’s not, especially when you think that you’ll end up building a working smart lock!
Requirements…
My goal expanded from a simple recognition of colours which would trigger moving the lock tongue, to a few more things around the general concept of a smart lock, so before I explain how it all works and share the code, let me list out the acceptance criteria.
- It had to recognise three colours, and based on those being correct, it had to move a LEGO mechanism. The order of colours was important for the core security of the lock. The actual LEGO build itself, did not have to be beautiful, just functional. This was my MVP — a concept I will write about very soon, so subscribe! All the next items in this list are to be considered additional features.
- It had to keep track of the number of unsuccessful attempts, and take action after a hard-coded number of tries. I set that to three, because three is a magic number and it’s a prime number (I verified that with Siri!), and weirdos like me like prime numbers.
- It also had to account for situations when the lock was new and needed installing for the first time, so a setup mode had to be coded into the software.
- A reset situation also felt like a standard enough feature request, so I had to allow for a solution to enable the user to trigger that mode, BUT only when the lock was unlocked — another security feature.
- It also had to feature a self-locking tongue. You know, the one where you just pull the door behind you and locks itself.
- It had to have a “security pin”, in this case I chose a colour I wanted to be ignored by the sensors, while that colour would be unknown to the potential intruder, making the key even more secure.
- Speaking of keys, it had to allow for variability, to make it impossible (or at least very difficult) to copy.
You can appreciate how the six additional features are both welcome, quite necessary for a superior and more secure user experience, and something closer to resembling a production device.
So, how does it work?
I’ll explain in plain English the overall user journey with some additional technical insight, after which you’re welcome to take a look at the code. I think this way you’ll understand better what I was going for and how the code achieves that.
Imagine that you just bought a new smart lock. It automatically locks behind you as you close the door, so that’s neat, but of course, you’ll also want to unlock it, so once you installed it and turned it on for the first time, it recognises it’s a new lock, and asks to be set up. You twist the colour cubes on your key to the desired combination and insert it. The three colour/light sensors pick the three colours up and save them to three variables. The next time the lock is initiated, it will recognise that those three variables have already been set, so it won’t ask to be set up again, but will proceed to the unlock routine, provided your key still is set to the same colour combination.
Should the key be set to another combination, it will alert you that you’re trying to attempt to unlock with an incorrect colour sequence. It will advise you to try again and also alert you how many tries you have left. Should you run out of tries, it initiates a burglar alarm — another security feature.
Of course, you may at times decide you want to reset the colour combination to something else. Maybe red-green-yellow is far too last year for you, and you’d like to go for blue-brown-black instead! Well, you can do that. While the door is open and the lock is turned on, you can push back on the tongue, which triggers the touch sensor, at which point the lock knows it’s meant to switch into reset mode. At this point, it will ask for the new colour combination and set it. The next time you want to unlock the door, you can use the new combination.
An aspect where I could have further improved on security here, is perhaps first asking for the existing colour combination, and only should that be correct, allow for a reset, however I decided not to, as it felt a bit over the top for a toy prototype.
You can watch the entire user journey (except the reset part) either on my Instagram or TikTok, and of course, you’re welcome to read through the code as well. It’s less than 100 lines!
from ev3dev2.motor import LargeMotor, OUTPUT_A, SpeedPercent
from ev3dev2.sensor import INPUT_1, INPUT_2, INPUT_3, INPUT_4
from ev3dev2.sensor.lego import TouchSensor, ColorSensor
import time

from ev3dev2.sound import Sound
spkr = Sound()

spkr.speak('Starting smart lock...')

lockMotor = LargeMotor(OUTPUT_A)
keyOne = ColorSensor(INPUT_1)
keyTwo = ColorSensor(INPUT_2)
keyThree = ColorSensor(INPUT_3)
readWriteToggle = TouchSensor(INPUT_4)
alarmSoundPath = '/home/robot/smartlock/spaceship_alarm.wav'
incorrectKeyMessage = 'Warning. Incorrect key.'
alarmMessage = 'Sorry, you failed three times, triggering home burglar alarm now.'
tryAgainMessage = 'Please try again.'
unlockMessage = 'Unlocking door now.'
setupColoursMessage = 'Please insert your desired color combination key.'
newLockMessage = 'New lock detected. Entering setup mode.'
newLockSetupConfirmationMessage = 'Key color combination saved. Have a safe home.'
resetMessage = 'Entering reset mode.'
resetConfirmationMessage = 'Key color combination updated. Have a safe home.'
initiateUnlockRoutineMessage = 'Please insert correct key.'

isKeyOne = None
isKeyTwo = None
isKeyThree = None
failedTriesCount = 0

keyOneColor = None
keyTwoColor = None
keyThreeColor = None
ignoredColor = 'White'

if readWriteToggle.is_pressed:
    spkr.speak(resetMessage)
    spkr.speak(setupColoursMessage)
    keyOneColor = keyOne.color_name
    keyTwoColor = keyTwo.color_name
    keyThreeColor = keyThree.color_name
    spkr.speak(resetMessage)
elif keyOneColor == None or keyTwoColor == None or keyThreeColor == None:
    spkr.speak(newLockMessage)
    spkr.speak(setupColoursMessage)
    keyOneColor = keyOne.color_name
    keyTwoColor = keyTwo.color_name
    keyThreeColor = keyThree.color_name
    spkr.speak(newLockSetupConfirmationMessage)

timer = time.time() + 60 * 1 # user has 60 seconds to unlock door
while time.time() < timer:
    spkr.speak(initiateUnlockRoutineMessage)
    if keyOne.color_name == keyOneColor:
        isKeyOne = True
    elif keyOne.color_name != ignoredColor and isKeyOne == None :
        isKeyOne = False
        spkr.speak(incorrectKeyMessage)
    if keyTwo.color_name == keyTwoColor:
        isKeyTwo = True
    elif keyTwo.color_name != ignoredColor and isKeyTwo == None :
        isKeyTwo = False
        spkr.speak(incorrectKeyMessage)
    if keyThree.color_name == keyThreeColor:
        isKeyThree = True
    elif keyThree.color_name != ignoredColor and isKeyThree == None :
        isKeyThree = False
        spkr.speak(incorrectKeyMessage)

    if isKeyOne and isKeyTwo and isKeyThree:
        spkr.speak(unlockMessage)
        lockMotor.on_for_rotations(SpeedPercent(10), 1)
        isKeyOne = None
        isKeyTwo = None
        isKeyThree = None
        failedTriesCount = 0
    else:
        spkr.speak(tryAgainMessage)
        failedTriesCount = failedTriesCount + 1
        if failedTriesCount == 3:
            spkr.speak(alarmMessage)
            spkr.play_file(alarmSoundPath)
            timer = 0
        else:
            spkr.speak('You have ' + str(3 - failedTriesCount) + 'attempts left.')
Closing thoughts
I am beyond ecstatic to have been able to sit down over the course of two evenings, and whip up a little prototype like this. LEGO Mindstorms was one of the first things I wrote about on Medium roughly 7 years ago, and I really wish I had more time to play around with robotics.
Speaking of robotics, somehow for me, this is the space where Python makes more sense. While in my day-to-day job I have plenty of exposure to Python in the form of server-side code and Django, I feel much more excited about the language in the context of tinkering and prototyping.
It was also quite interesting to act as a product owner on a project where I had to define what was acceptable as an MVP and what was more fit to be a feature built on top of that initial minimum viable product. Learning a lot from the LockPickingLawyer in terms of lock security also helped me make more informed decisions around the design of the key and some of the coding.
I have to stress this again, The LEGO Group is making a huge mistake by discontinuing the Mindstorms theme. I think EV3 was to date the best, most fun and most accessible robotics prototyping and programming tool. It will be sorely missed, and boy am I happy to own not one, not two, but three sets! Glad I listened to my gut feeling back in 2015 and 2016!
So, what do you think about my LEGO smart lock and how would you improve on the security aspect of it?
Attila Vago — Software Engineer improving the world one line of code at a time. Cool nerd since forever, writer of codes and blogs. Web accessibility advocate, LEGO fan, vinyl record collector. Loves craft beer! Read my Hello story here! Subscribe and/or become a member for more stories about LEGO, tech, coding and accessibility! For my less regular readers, I also write about random bits and writing.


